For this undertaking we’ll want two Bluetooth low vitality usb dongles, one linked to the Nucleo board and one linked to a pc to manage from internet browser. The net script can also be accessible on GitHub.
When the BleuIO Dongle is linked to the Nucleo boards USB port the STM32 will acknowledge it and straight begin promoting. This permits the opposite Dongle to connect with it.
It would additionally settle for 3 completely different inputs from the UART:
enter and consequence
0 Ship ATI (Request system data) command to BlueIO Dongle.
1 Manually flip the LED on
2 Manually flip the LED off
Now we have used a STM32 Nucleo-144 growth board with STM32H743ZI MCU (STM32H743ZI micro mbed-Enabled Improvement Nucleo-144 collection ARM® Cortex®-M7 MCU 32-Bit Embedded Analysis Board) and the WS2812, a clever management LED gentle supply, for this instance.
Join the LED to the Nucleo Board by connecting:
4-7 VDC to 5V
GND to any GND
DIN to PE9
On the Nucleo NUCLEO-H743ZI2:
Observe : If you wish to use one other setup you’ll have to make sure that it assist USB Host and beware that the GPIO setup may be completely different and will should be reconfigured within the .ioc file.
Undertaking requirments
Two BleuIO dongles (https://www.bleuio.com/)
A board with a STM32 Microcontroller with a USB port. (A Nucleo-144 growth board: NUCLEO-H743ZI2, is used for this undertaking. (https://www.st.com/en/evaluation-tools/nucleo-h743zi.html)
To attach the dongle to the Nucleo board a “USB A to Micro USB B”-cable with a USB A female-to-female adapter can be utilized.)
STM32CubeIDE (https://www.st.com/en/development-tools/stm32cubeide.html)
An WS2812 RGB LED
Concerning the Code
The supply code is on the market at
https://github.com/smart-sensor-devices-ab/stm32_bleuio_rgb_led_example
This undertaking is predicated on one other STM32 undertaking (https://github.com/smart-sensor-devices-ab/stm32_bleuio_example) with the interface to the WS2812 Interface WS2812 with STM32 by Controllers Tech
The DIN pin might be linked to TIM1 which should be enabled in to the .ioc file:
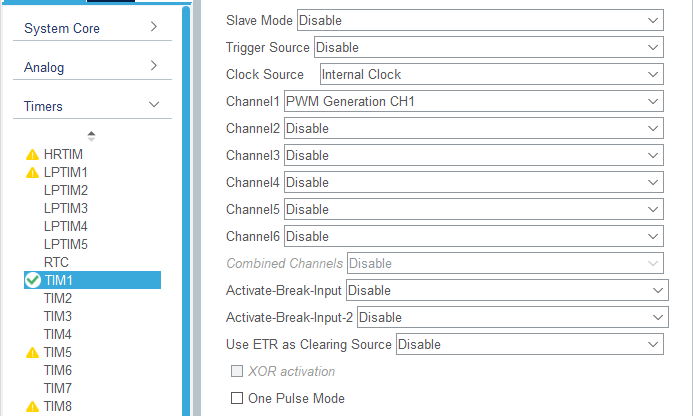
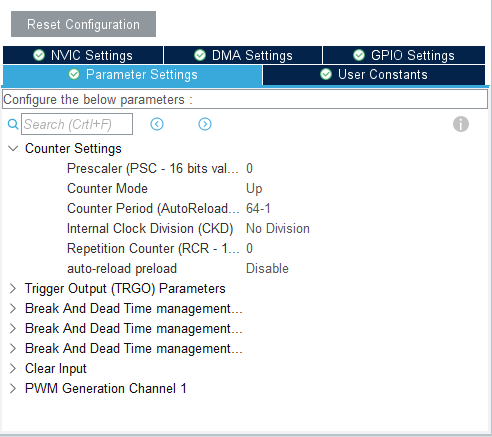
Parameter Settings:
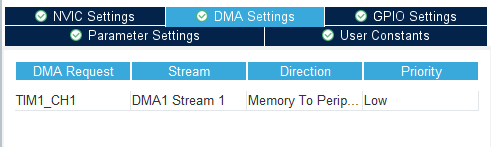
DMA for TIM1 may even be enabled:
In major.c we might want to add a callback for TIM PWM Pulse Completed:
void HAL_TIM_PWM_PulseFinishedCallback(TIM_HandleTypeDef *htim) {
HAL_TIM_PWM_Stop_DMA(&htim1, TIM_CHANNEL_1); datasentflag=1;
}
In major.c there’s additionally a capabilities for controlling the LED.
Set_LED() for altering the colour of the person LEDs.
Set_Brightness() for setting the brightness. A brightness worth of 0 means the LED is turned off.
WS2812_Send() execute the modifications we made to the LED.

We additionally replace the handleUartInput perform so we will have guide management over the LED through the UART.

How you can setup undertaking
Downloading the undertaking from GitHub
Get undertaking HERE
https://github.com/smart-sensor-devices-ab/stm32_bleuio_rgb_led_example
Both clone the undertaking, or obtain it as a zipper file and unzip it, into your STM32CubeIDE workspace.
Importing as an Current Undertaking
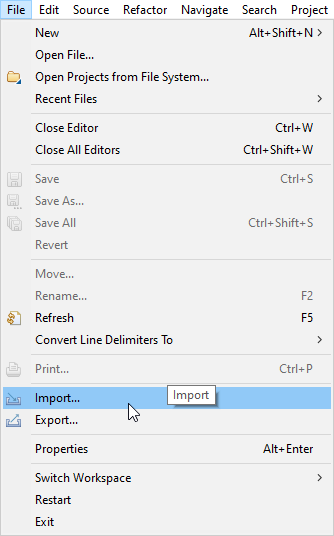
From STM32CubeIDE select File>Import…
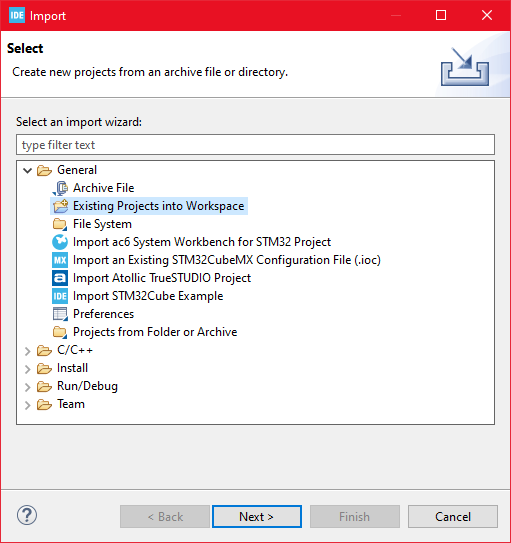
Then select Normal>Current Initiatives into Workspace then click on ‘Subsequent >’
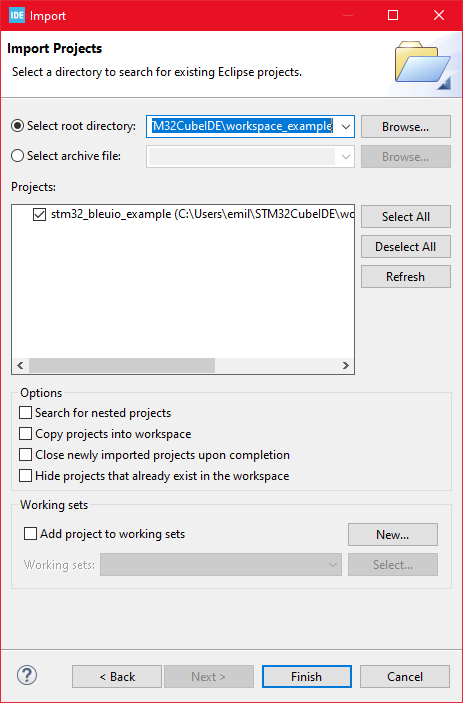
Be sure to’ve choosen your workspace in ‘Choose root listing:’
You need to see the undertaking “stm32_bleuio_rgb_led_example”, examine it and click on ‘End’.
Working the instance
In STMCubeIDE click on the hammer icon to construct the undertaking.
Open up the ‘STMicroelectronics STLink Viritual COM Port’ with a serial terminal emulation program like TeraTerm, Putty or CoolTerm.
Serial port Setup:
Baudrate: 115200
Information Bits: 8
Parity: None
Cease Bits: 1
Circulate Management: None
Join the BleuIO Dongle earlier than working the instance
In STMCubeIDE click on the inexperienced play button to flash and run it in your board. The primary time you click on it the ‘Run Configuration’ window will seem. You may simply depart it as is and click on run.
You ought to be greeted by this welcome message:
Welcome to STM32 BleuIO RGB LED Instance!
Press 0 to run the ATI command
Press 1 to manually activate LED
Press 2 to manually flip off LED
The LED will activate briefly when beginning up.
Wait till the message: “[BleuIO Dongle Ready]” is proven.

The LEDs ought to now flip off and now you can join with the opposite dongle utilizing the script.
You too can use the uart instructions (0, 1 or 2):
Press 0 to get system data.
1 to activate LED.
2 to show off LED.
Dongle response might be printed to UART.
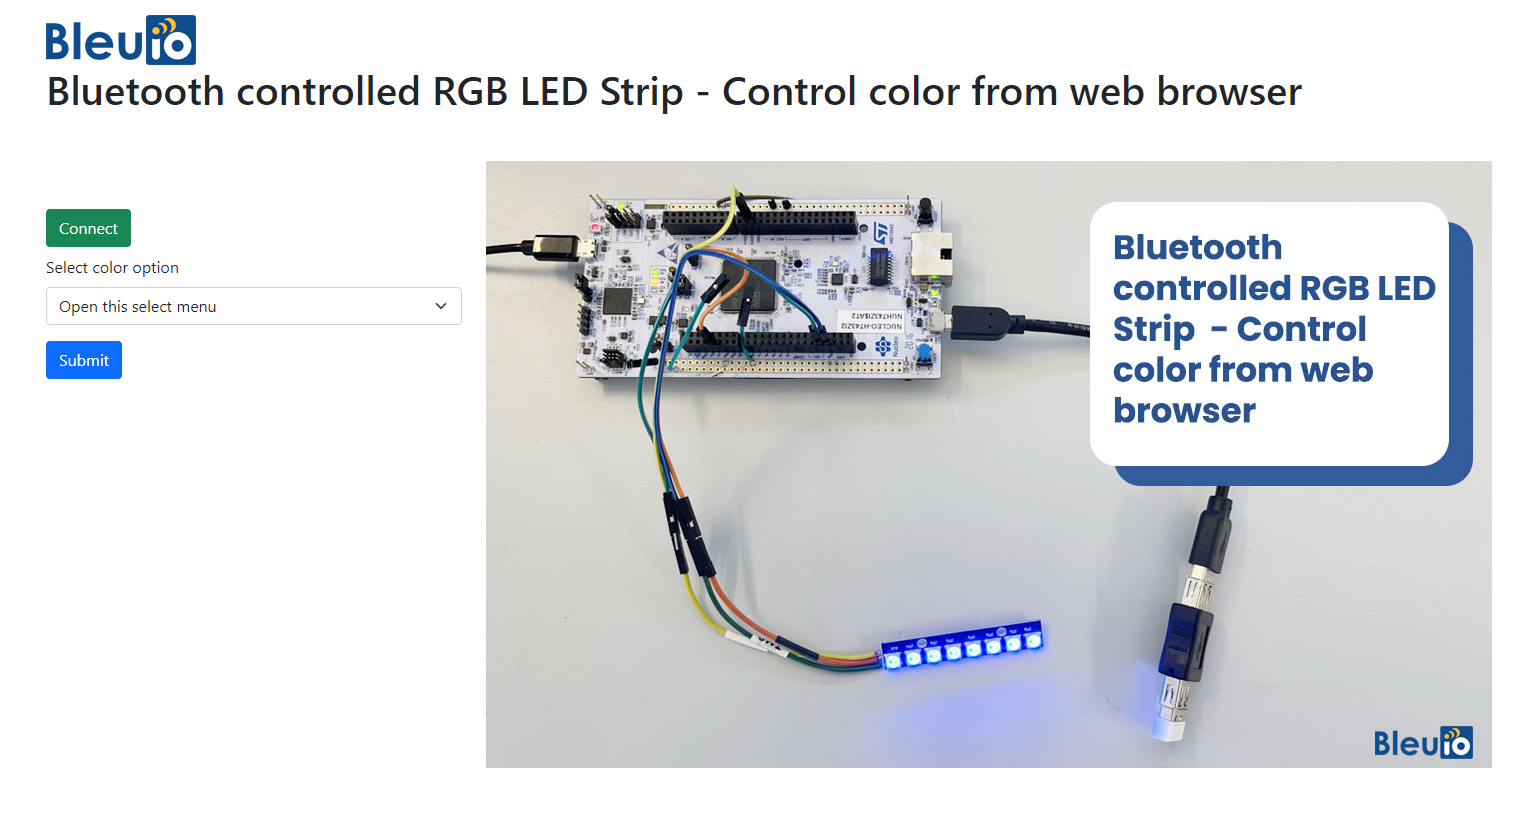
Management the colours from an online browser
Join the BleuIO dongle to the pc. Run the online script to connect with the opposite BleuIO dongle on the STM32. The net script is on the market contained in the supply file. Now we will management the colours wirelessly.
For this script to work, we’d like
BleuIO USB dongle linked to the pc.
BleuIO javascript library
Chrome 78 or later, and you must allow the #enable-experimental-web-platform-features flag in chrome://flags
An internet bundler – (parcel js)
Create a easy Html file known as index.html which can function the frontend of the script. This Html file comprises some buttons that assist join and skim marketed knowledge from the distant dongle, which is linked to stm32.

Create a js file known as script.js and embrace it on the backside of the Html file. This js file makes use of the BleuIO js library to jot down AT instructions and talk with the opposite dongle.

The script has a button to connect with COM port on the pc. After connecting to the dongle , we should always have the ability to management the colours of the LED strip.
To hook up with the BleuIO dongle on the STM32, make sure that the STM32 is powered up and a BleuIO dongle is linked to it.
Get the MAC tackle
Observe the steps to get the MAC tackle of the dongle that’s linked to STM32
– Open this web site https://bleuio.com/web_terminal.html and click on connect with dongle.
– Choose the suitable port to attach. – As soon as it says linked, kind ATI. This may present dongle data and present standing.
– If the dongle is on peripheral function, set it to central by typing AT+CENTRAL
– Now do a spot scan by typing AT+GAPSCAN
– When you see your dongle on the record ,cease the scan by urgent management+c
– Copy the ID and paste it into the script (script.js) line #2
Run the online script
You’ll need an online bundler. You should use parcel.js
As soon as parcel js put in, go to the basis listing of internet script and kind “parcel index.html”. This may begin your growth setting.
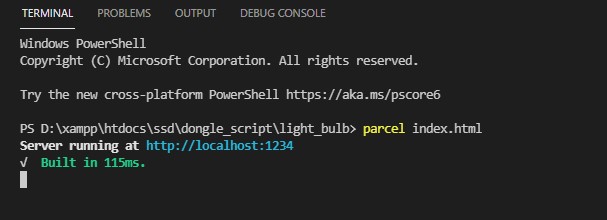
Open the script on a browser. For this instance we opened http://localhost:1234
You may simply connect with the dongle and replace the LED strip.
The net script appears to be like like this